Melbourne’s Trusted Experts in Automated Gates & Fencing – Residential, Commercial & Industrial Solutions.

How to Prepare Your Property for a New Gate Installation
Learn how to prepare your property for a smooth gate installation. Avoid delays and extra costs with these practical tips on space, power, permits, and setup
5/6/20267 min read
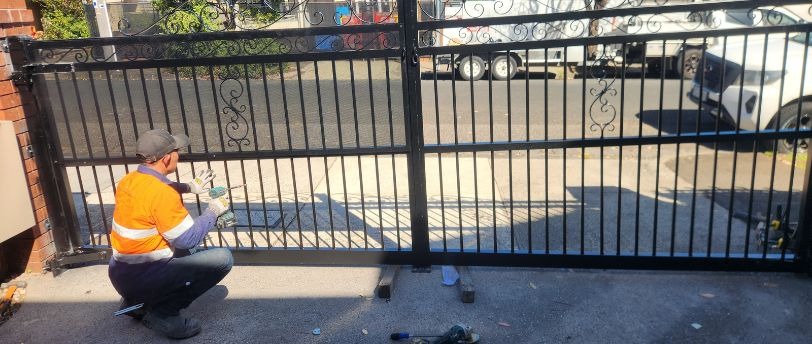
Getting a new gate put in is one of those jobs that looks straightforward from the outside. Most people focus on picking the right style and material, which makes sense. But there's a fair bit of work to sort out before the installer even shows up. Skip that part, and you can end up with delays, extra costs, or a gate that doesn't sit or operate the way it should.
This guide covers what you need to do before your gate installation day. Whether you're getting a sliding gate, a swing gate, or a fully automated system, the steps are mostly the same.
Why Preparation Actually Matters
A lot of people assume the installer handles everything. They handle the gate itself, yes. But they still need a clear, safe, and accessible site to do the job properly. If the ground isn't ready, there's no power nearby, or council requirements haven't been checked, the job can stall fast.
Poor prep can push the work out by days and cost you more in labour if the crew has to stop and wait. A bit of time spent beforehand saves a lot of back-and-forth on the day.
1. Decide on the Right Gate Type for Your Space
Before anything else, figure out what type of gate suits your driveway. The style matters, sure, but so does the space you're working with. A gate that looks great on someone else's property might not physically fit yours.
Sliding gates move along a track parallel to your fence. They need a clear run of space beside the opening, roughly 1 to 1.5 times the gate width. If your driveway is on a slope or has narrow side clearance, a sliding gate may not work. Many Melbourne homeowners with sloped driveways go for sliding gates since they don't need a ground track at all.
Swing gates open inward or outward like a regular door. They need room to move without hitting a vehicle, a wall, or a post. If your driveway is short, swinging inward can cause problems when a car is parked close to the entrance.
If you're not sure which type suits your block, most installers will do a site visit before the job starts. That one conversation can save you from making the wrong call.
2. Measure Your Driveway Opening
Measure your driveway width at the entrance point, not halfway down. Also measure the height of any existing posts or pillars you plan to keep. If old posts are staying, check whether they're level and in solid condition. Leaning or cracked posts may need replacing before a new gate goes on. A gate hung on weak posts will sag and stop closing cleanly after a while.
Note any incline at the entrance too. Slopes affect how swing gates operate and whether a ground track for a sliding gate will sit flat. Take a few photos and send them to your installer before the quote.
3. Check Your Council and Permit Requirements
Some gate installations in Melbourne need council approval. It depends on the gate height, how it opens, and whether your property sits in a heritage or neighbourhood character overlay.
A few things worth checking:
Does your gate height go over the limit allowed without a permit? Most Melbourne councils set that at around 2 metres for front fences and gates.
Is your property in a heritage overlay? These areas often have rules around materials, colours, and styles.
Are you on a corner block? Gates near intersections can have setback and visibility requirements.
Do you live in a complex with a body corporate? They may have their own design guidelines.
Check your local council's planning portal or give them a call. It's a quick step that can prevent bigger problems down the track.
4. Sort Out the Power Supply
This is probably the most overlooked part of prep. Automated gates need power, and if it's not sorted before the installer arrives, the job can be held up.
Most gate automation systems run on 240V mains power. The installer needs a power point or a direct cable run within reach of the motor location. If there's no power near your gate, a licensed electrician needs to run a cable before or on the day.
Check these things ahead of time:
Is there a power point within 10 to 15 metres of where the motor will go?
If not, is there a path to run a cable underground?
Have you booked an electrician if one is needed?
Is solar an option? Solar-powered motors suit properties where running a cable is tricky or too costly.
Bring this up early with your installer. Finding out there's no power on the morning of installation is not a great start
5. Clear the Installation Area
The team needs clear access to the gate area on the day. No cars in the driveway, no tools left around the fence line, and no overgrown plants crowding the posts. If there's a garden bed along the fence where posts need to go, trim it back before the crew arrives. Plants growing right into the post area make digging harder and can interfere with the concrete work.
Clear the path from the street to the gate area as well. Installers sometimes bring equipment on trolleys or carry long lengths of aluminium or steel, so a clear run makes a real difference.
6. Check the Ground Condition
Gateposts and motor bases get concreted into the ground. If the soil is loose, sandy, or waterlogged, extra work may be needed to stabilise the footing before anything else can happen.
For sliding gates, the track runs along the driveway surface. Cracked, uneven ground or tree roots underneath may need grinding or levelling beforehand. On a concrete driveway, the surface sometimes needs cutting to lay the track flush.
Ground problems to look out for before the job:
Cracked or sunken concrete at the entrance
Soft or waterlogged soil near the fence line
Tree roots close to where posts will go
Large rocks that could complicate digging
If you know your soil has issues, mention it before the quote comes through. It avoids extra charges showing up later.
7. Plan Your Intercom and Access System Early
If you want an intercom, keypad, or video entry alongside your gate, plan it before installation day, not after.
Cabling for an intercom or access panel is far easier to run before the gate is installed. Once posts are concreted in and the motor is bolted down, retrofitting cables gets harder and more expensive.
Common access options to think about
If you're putting in remote control gates or a full automatic security gate setup, sort the access options at the same time. Trying to add them later almost always costs more.
8. Let Your Neighbours Know
If your gate swings outward toward a shared boundary or a neighbour's driveway, let them know ahead of time. It avoids any friction once concrete is being poured and work is underway.
Some councils also require neighbour notification when work happens near a shared fence line. Even when it's not required, a quick heads-up goes a long way.
9. Have Someone Home on the Day
Try to be home on installation day, or have someone there who can answer questions. The crew may need to confirm post placement, cable routing, or the position of an intercom panel before drilling starts.
Keep kids and pets away from the work area. There's digging, concrete mixing, and power tools involved. Once the driveway is clear and power is sorted, there's not much else you need to do. Let the team get on with it.
Ready Before the Crew Arrives: That's Really All It Takes
Gate installation in Melbourne goes smoothly when the site is ready and the key decisions are made before the van pulls up. None of the prep here is complicated. It's mostly checking a few things, making a couple of calls, and clearing some space.
For automated gate systems, the prep matters a bit more. Power, ground conditions, and access control all feed into how well the finished system runs. Getting those things locked in beforehand means less back-and-forth on the day and a better result overall.
iGate Automation installs gates across Melbourne and surrounding suburbs including Brunswick, Reservoir, Northcote, and beyond. Whether it's a residential driveway gate or a commercial automatic gate for a business, a well-prepped site makes the whole job run better.
Your Next Step Starts at Your Driveway
Once you've worked through this list, the logical next step is a site visit. A proper look at your property means the gate gets designed around your actual space, not a rough guess from a phone call. iGate Automation offers a free quote and will walk you through what your site needs before any work begins.
Book your free quote with iGate Automation and get the right gate sorted for your property.
Frequently Asked Questions
1. Do I need a permit to install a gate in Melbourne?
Most standard residential gates under 2 metres don't need a permit. But if your property is in a heritage overlay zone, on a corner block, or the gate is unusually tall, council approval may be required. Check with your local council before any work starts.
2. How far does the power supply need to be from the gate motor?
Installers generally need a power point within 10 to 15 metres of the motor location. If there's nothing nearby, a licensed electrician will need to run a cable. Solar-powered motors are worth considering on properties where cable runs are difficult or costly.
3. Can a gate be installed on a sloped driveway?
Yes. Sloped driveways are common across Melbourne and don't stop a gate going in. Cantilever sliding gates work well on slopes because they don't use a ground track. Swing gates can also be adjusted to work on an incline. Your installer will check the slope during the site visit.
4. How long does a gate installation usually take?
Most residential jobs take one to two days. That covers post setting, concreting, gate fitting, motor installation, and testing. Jobs that include intercom systems or loop detectors may run a bit longer.
5. Can an existing manual gate be automated?
Often, yes. Both sliding and swing manual gates can be automated if they're structurally sound. The installer will look at the gate's weight, post condition, and power supply before confirming. In some cases, replacing an old worn gate works out cheaper than automating it.
Address : 22 Barkly St, Brunswick East VIC 3057, Australia
Connect With Us On Social Media
I Gate Automation
ABN 25 634 531 231
Our Privacy Policy
Our Terms & Conditions
Contacts
1300 251 900
info@igateautomation.com.au